
Learning Area: STEM
Time: 60 minutes
Grades: 2-5
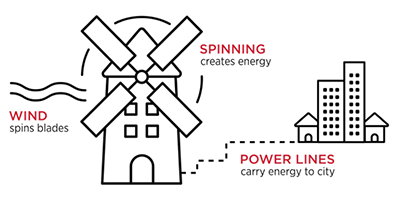
Let’s build a wind-powered city! Try these instructions to help start your build. What else can you find around the classroom to complete the city?
Materials:
- Toothpicks
- Cardboard tubes and paper
- Scotch® Washi Tape
- Scotch® Magic Tape
- Scissors
- Scotch® Clip & Twist Tape Dispenser
- Post-it® Super Sticky Notes
Instructions:

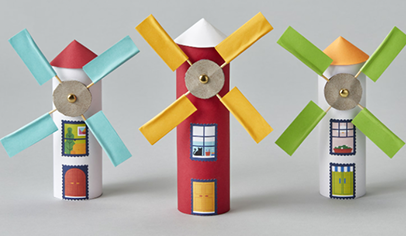
Create the base
To create the base of your windmill, wrap your toilet paper roll with construction paper and tape along the seam.

Build fan blades
To create your windmill blades, wrap Post-it® Super Sticky Notes around the end of a toothpick. Repeat three more times to create four blades total. Cut out a circle of thick paper or cardboard slightly larger than a quarter. Have your teacher help you pick a toothpick through the center of the circle and near the top of the toilet paper roll. Place the four blades on the circle and attach with tape.

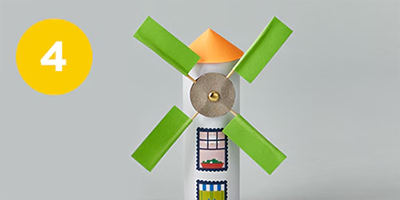
Attach blade
Attach the circle with blades on it to your windmill with a paper fastener. Blend the two ends of your paper fastener on the inside of the windmill to secure the blades in place.
Seal with a roof
To create a roof, cut out a circle of paper approximately 2.5” wide. Find something round in your classroom to trace around. Cut towards the center of the circle to create a small slit half the width of your circle. Place one flap over the other to make a cone shape. Tape the roof together and then attach to the body of your windmill. To finish your windmill, attach some doors and windows!